Every day we see an increase in people replacing their digital cameras for their smartphones to take pictures. This is mainly because manufacturers are adding some incredible lenses to smartphones, which make it a very convenient device to capture daily moments and upload them quickly to social media apps.
Smartphone cameras do not provide the quality photos that a good digital camera can provide, which are recommended for listings. Nevertheless, here at Tech Helpline, we see a trend of agents using their smartphones to take pictures for their listings. For this reason, today we will show you some quick tips on how to get the best possible image using an iPhone with iOS 9. All features listed below are available on the iPhone 5 or newer.
1. Use Auto Focus (AF)
This is the most import feature to use. Without using this option, your image could appear blurry or lose detail. Here is what you do: Tap the area on your screen that you wish to focus on, remove your finger and wait a couple of seconds to allow the camera to focus on the subject before taking the photo.
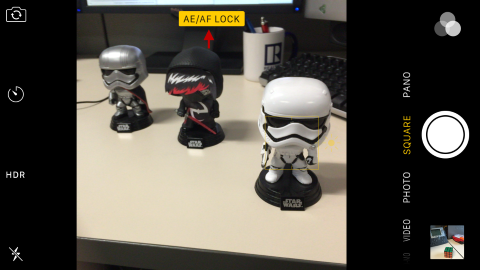
You can also tap and hold the area on your screen, until the yellow “AE/AF LOCK” appears (Auto-Exposure/ Auto-Focus Lock). This will allow you to take photos from different angles without losing focus on the subject.
2. Set up the Grid
Use the grid to apply the “rule of thirds” technique to your photos. The grid is composed of two vertical lines and two horizontal lines that help you locate the point of interest easier. This technique, which has been applied to visual images of all types for centuries, proposes that by positioning important parts of the image off center (along the lines and intersections) will make for a better, more interesting picture.

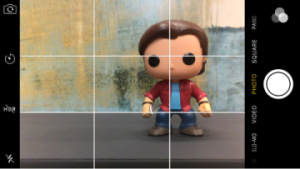
How to activate the grid: Open Settings > select Photos & Camera > turn on Grid
3. Opt for Square
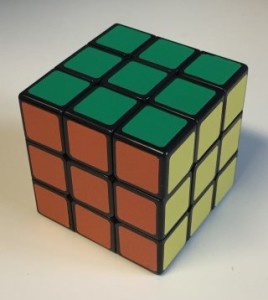
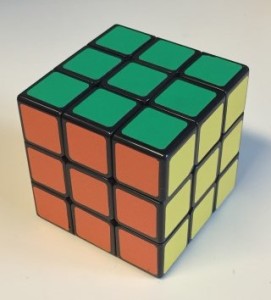
If you plan on uploading your images to social media or an MLS, use the Square mode. This will allow you to avoid needing to crop important details of your photo later when uploading it. The square mode takes a photo in 1:1 square proportions, instead of the standard, rectangular dimensions.

Top of the Police Box gets cropped

Nothing gets cropped
To use it, open your camera, click on the word SQUARE and swipe it left to place it in the middle of the screen (the word turns yellow), then take your photo as usual.
4. Try High Dynamic Range (HDR)
HDR photos are many images taken with different exposures and combined into one, well exposed image, giving you a much better image. Note: It is important that the subject is not moving or the image may come out blurry. Also this shot is slower to capture since its gathering multiple images. To activate HDR for a photo, tap on HDR at the top of the phone, and then tap ON.
No HDR
With HDR
4. Choose a Filter
Want to give your photos an interesting look? Try this: Open your iPhone camera. See those three circles on the bottom right? Tap on them to open the built-in filters. Then tap on one filter option (Mono, Fade, Process, etc.) to select it and create a unique look for your photos. (Tap the three circles again to remove the filter or to select a different one.) Take the photo as usual.
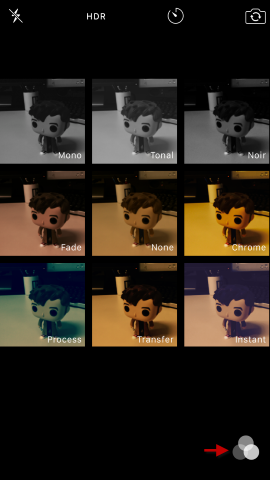

After you take the photo, you can remove the filter by opening the photo, clicking on ‘Edit’, then clicking ‘Revert’, and then ‘Revert to Original’.
BONUS TIP: Swipe up
While your phone is locked, locate the camera icon on the bottom right, click on it and swipe up. Voila! You are ready to begin snapping photos without even unlocking your phone.
Contributions to this article were made by Marc Zayas, Tech Helpline Team


